Cross stitched notes
Paper crafts are my favorite. But paper crafts that include needle and thread embellishments … my absolute favorite. Cross stitch is versatile and so easy for creating designs. This quick notecard occupied me on a recent rainy day and took just a few minutes of design effort.

My preference is to upcycle post consumer paper, in this case a tissue box folded backwards. Perfectly sturdy for prepunching the needle holes.

Finish it off with an inside fold of white paper. A large junk mail envelope works perfectly!

Tied at the center, it’s ready to carry a note in the most unique style.
I came upon some vintage cross stitch patterns in my late grandmother’s sewing box recently and can’t wait to try them in a new design!
Thanks for visiting. Please leave a message if you have a favorite cross stitch design you’d like to share.

Vintage keys and jewelry – a curated collection
Sorting through some of my late mom’s jewelry during rainy hurricane Harvey, I was inspired to tap into a place of creativity and make a collection. Thankfully, all the raw material was at hand.
Some vintage keys

A few watch faces
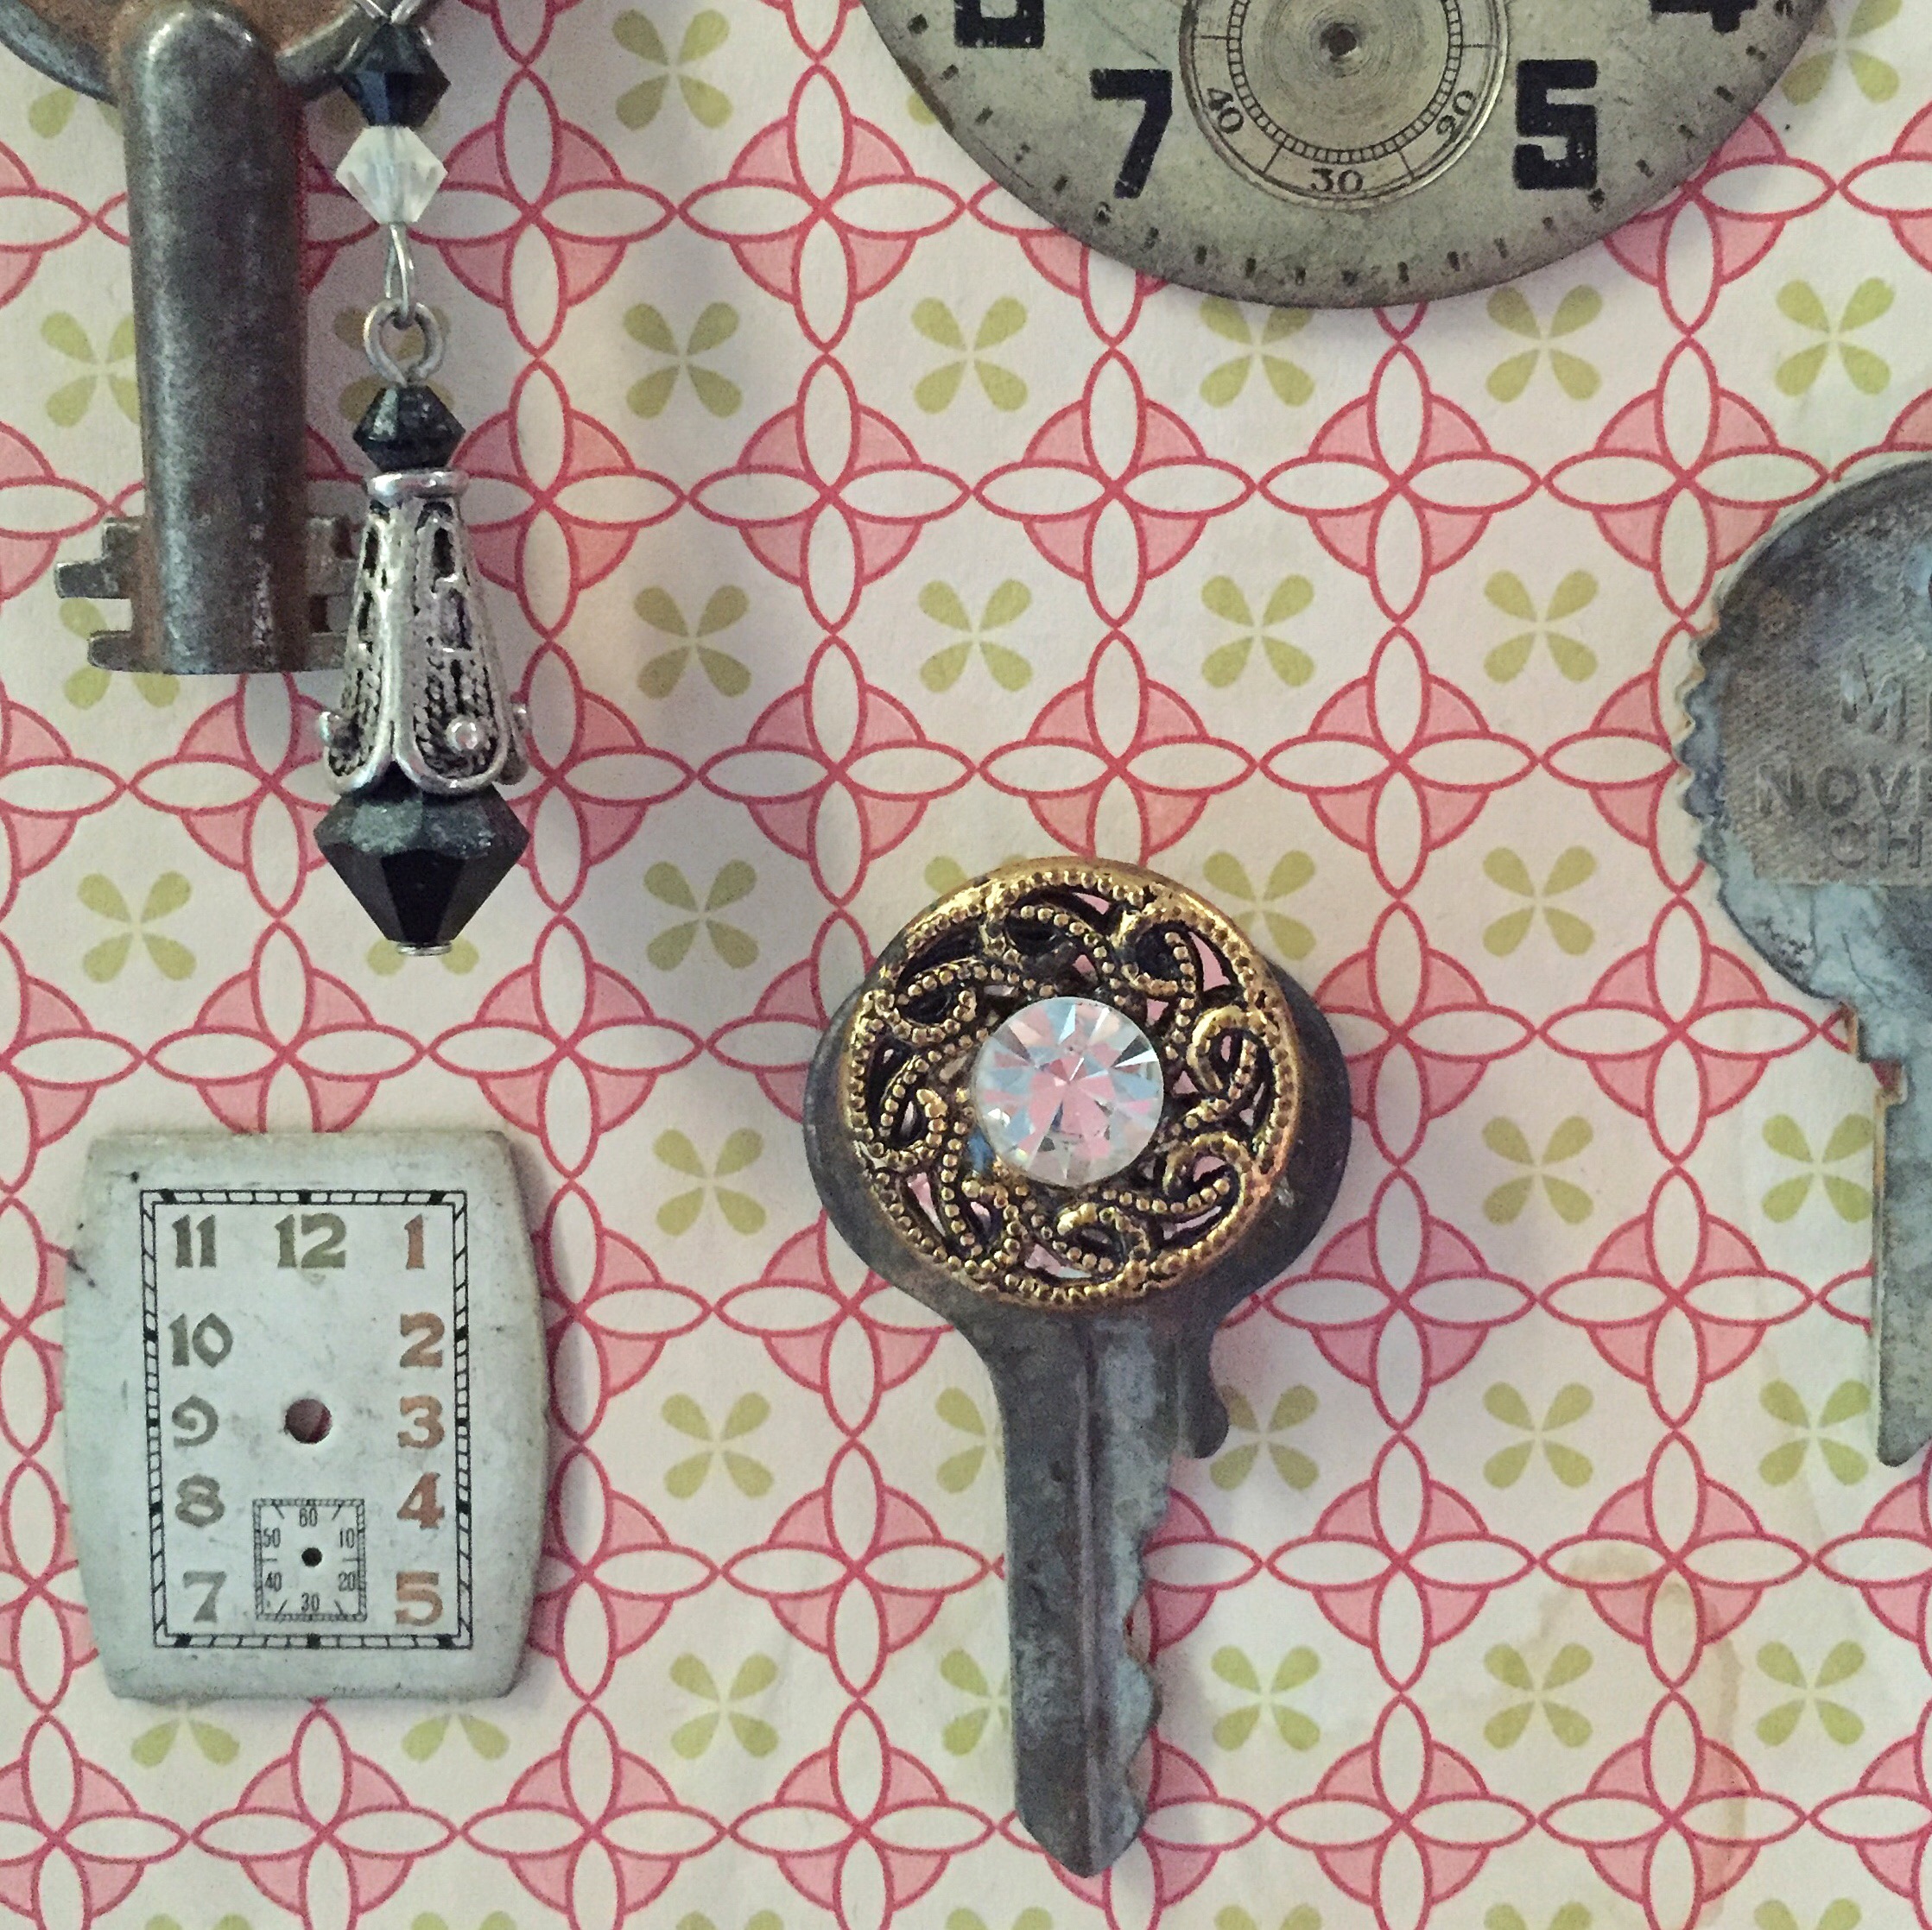
And pretty earrings paired with each key.
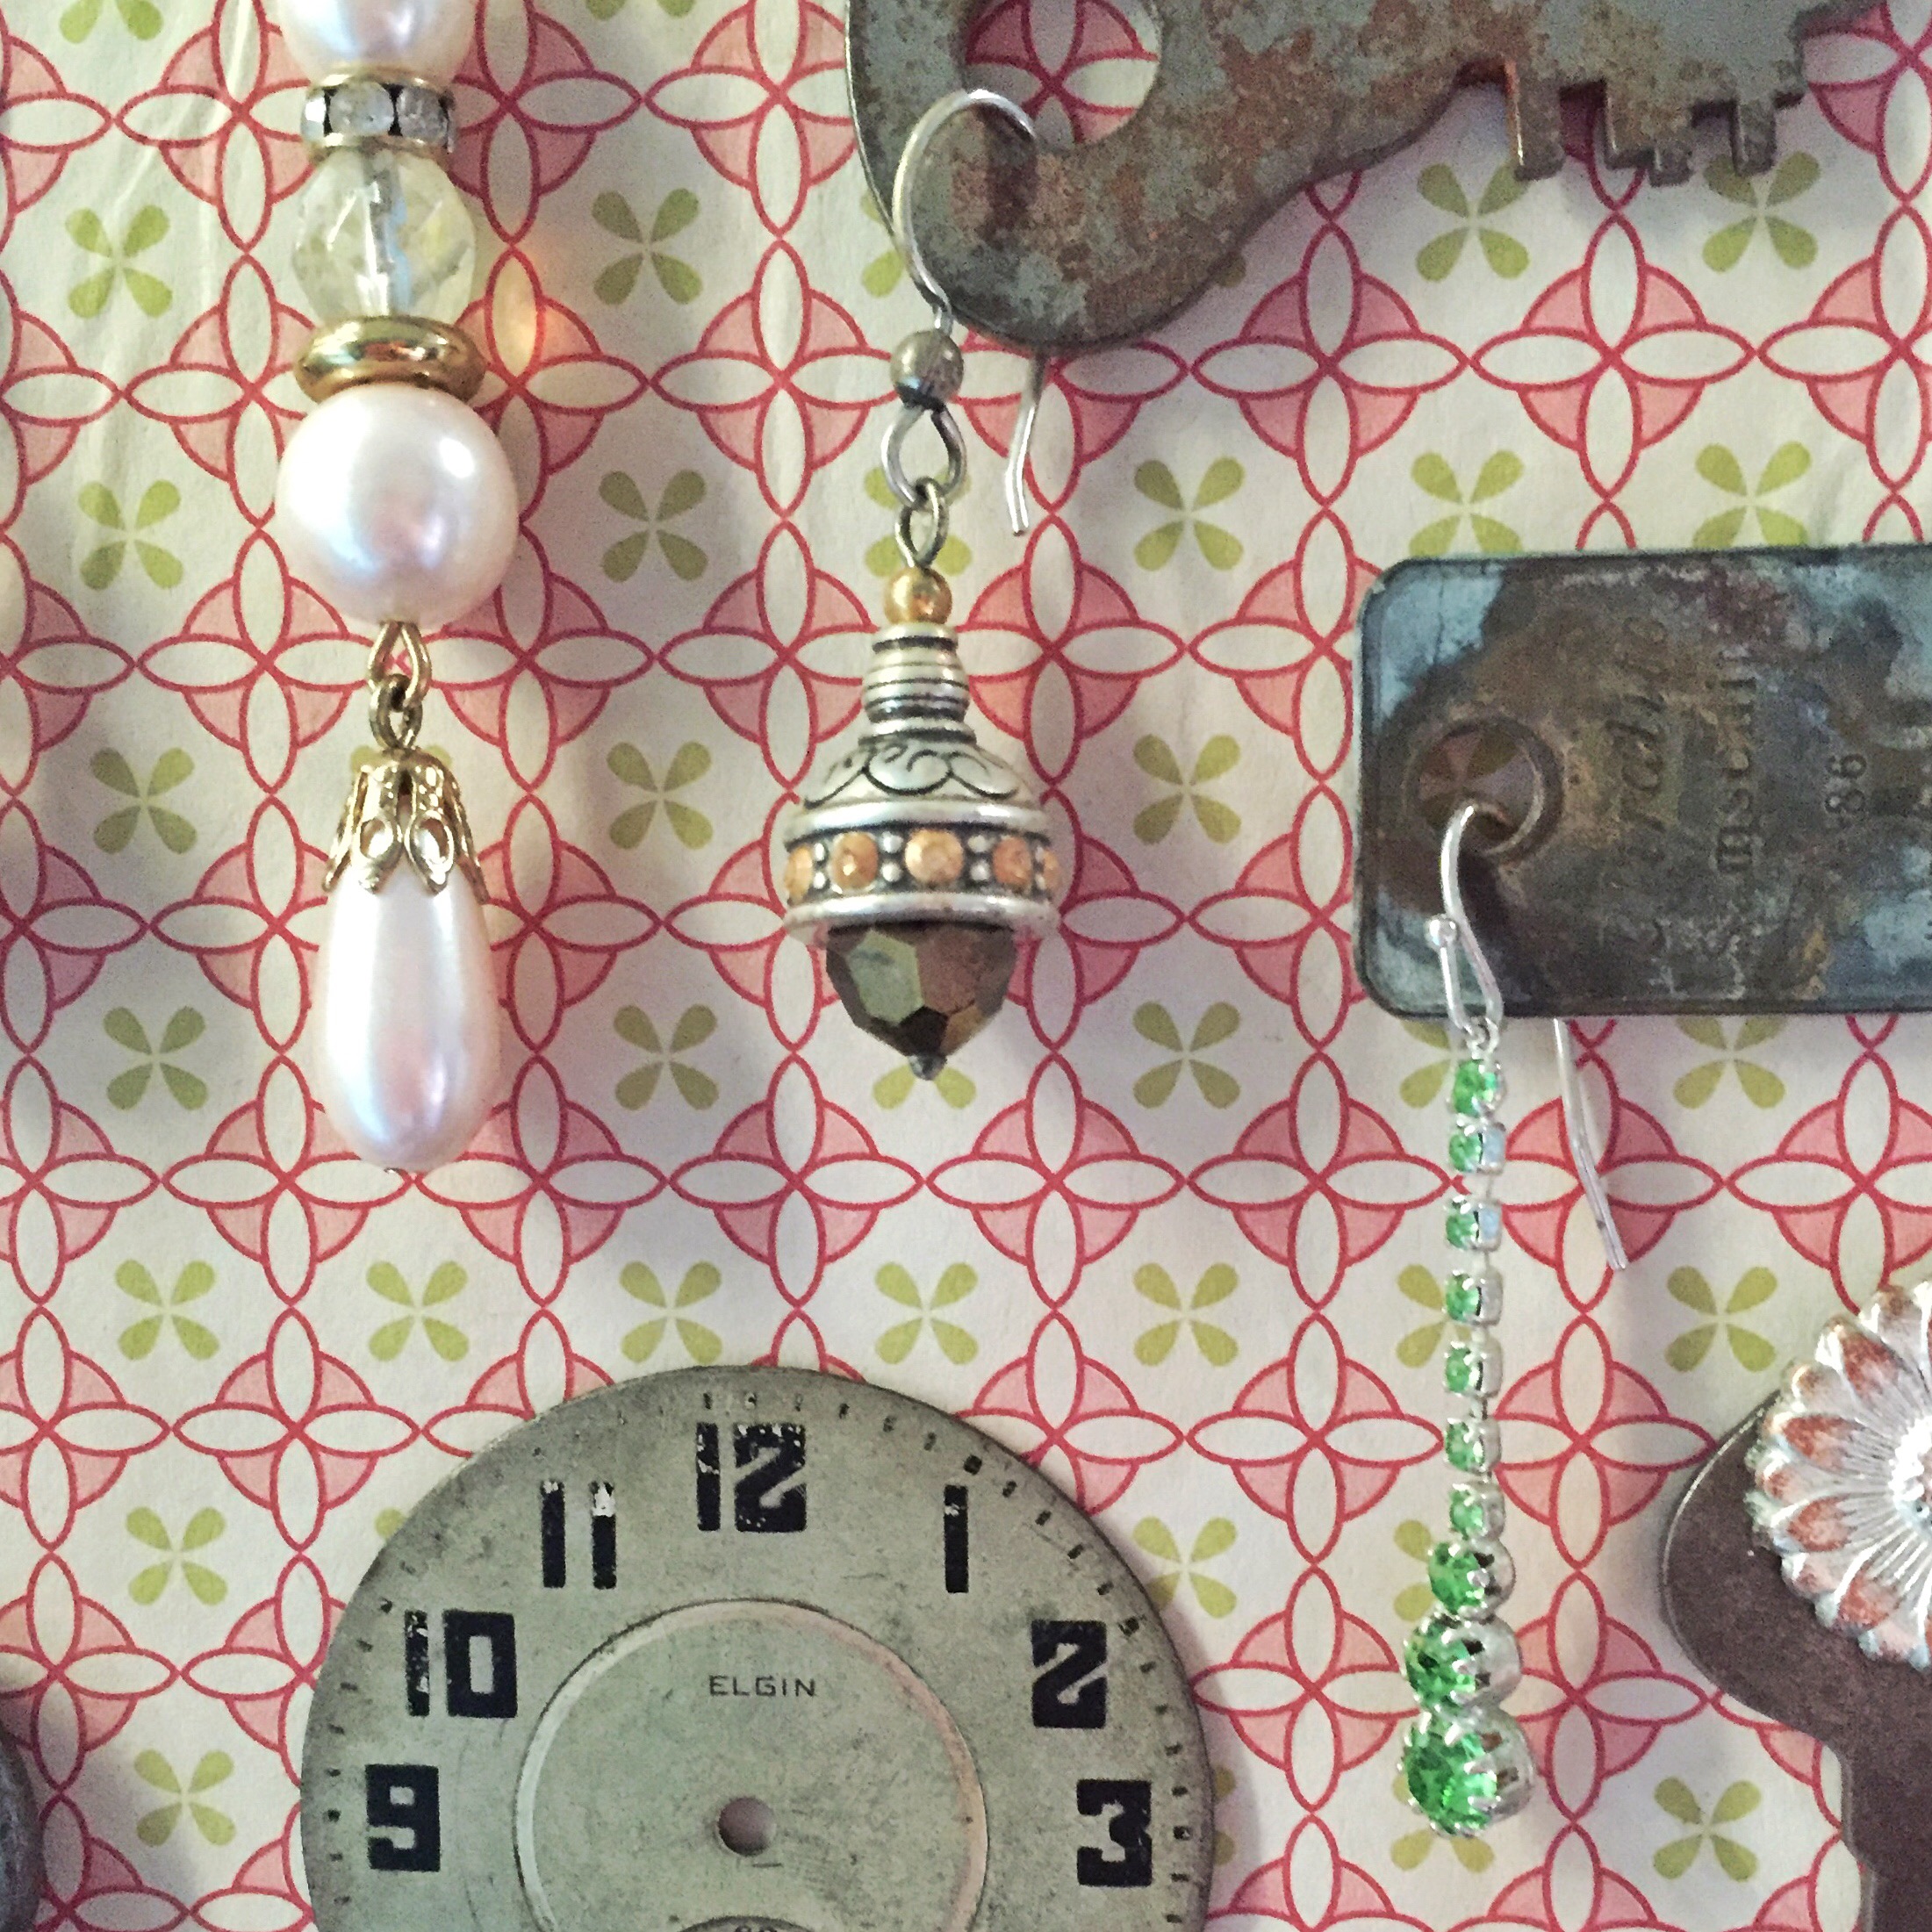
I had an unused picture frame that was badly scratched, but that was exactly the finish I wanted. A scrap of wrapping paper, a little tea staining, and adhesive to hold the curated collection together.
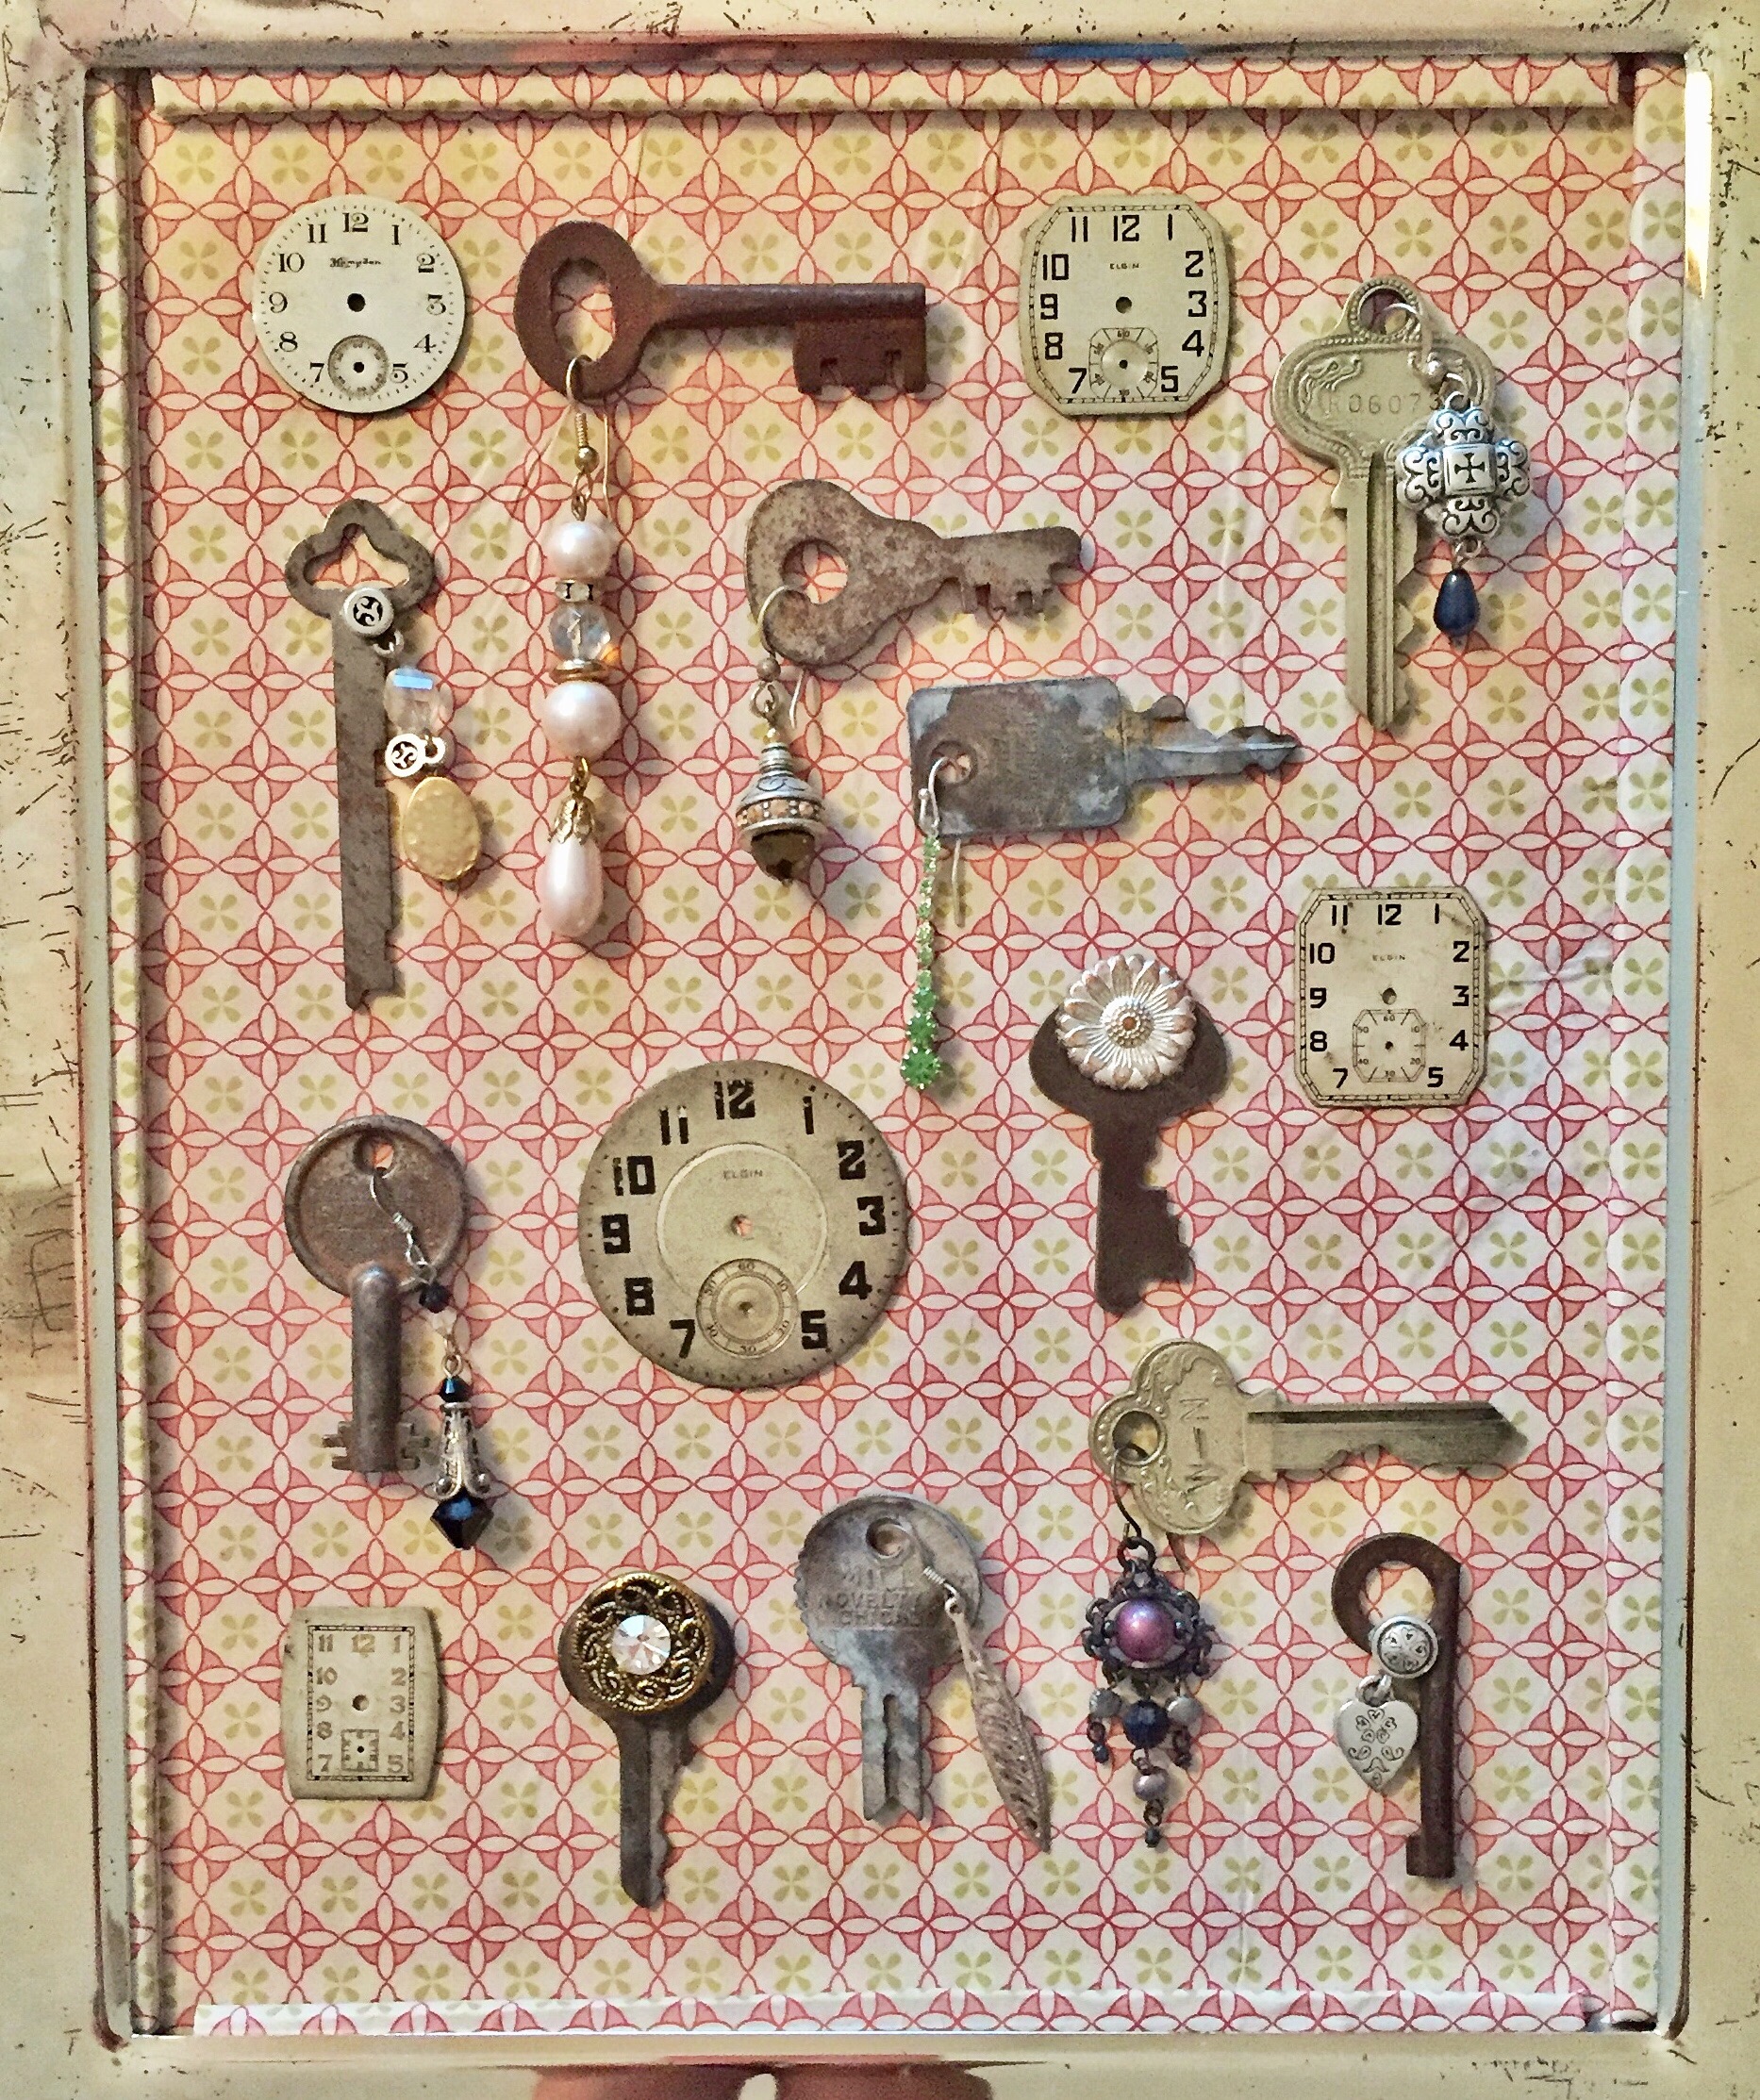
Making these mini curated collections has become one of my favorite things. An unique way to elevate ordinary objects as an artful expression.
Thanks so much for stopping by. Please leave a message, especially if you have a recommendation for ways to repurpose jewelry!
Shared with – Ginger Snap Crafts , Nifty Thrifty Things, Feathered Nest Friday
New paper chain garland
Christmas trees are cropping up and my heart is singing for joy. Some new crafty creations are adorning the trees this year. One of them is a new take on the old-school paper chain.

I wanted to create a two-dimensional version, since most of my hand made tree decorations are flat, or have only a slight amount of relief. I haven’t seen this kind of a paper chain anywhere else, so I’m claiming it as an original design.
Here’s a closer look.

And an even closer look. See how the circular links fit together?

Here’s my link template and one completed link. Fold the middle extensions behind the link and glue them together to form a sleeve. The open end of each link passes through the sleeve on an adjacent link. How simple!

I use post-consumer paper, like colorful cracker and cereal boxes. Trace the template on the back with pencil, cut out and glue. Then connect the links together and add to your tree for a colorful treat!

I love glittery, expensive glass decorations just like everyone else … but honestly, the nostalgia of making Christmas tree ornaments brings back all that magic. Hope your tree decorating season is filled with joy.
Christmas in July giveaway!
Patience Brewster is an artist after my own heart and I have been honored to make the acquaintance of her lovely daughter Marietta recently, so I started reading the Patience Brewster blog.
Much to my surprise, they’re having a #ChristmasinJuly celebration by hosting a giveaway contest on their blog. And it’s pretty amazing if I do say so myself.

This charming Nicholas, bearer of a golden candle, will be awarded to one lucky winner! Click on the picture above and head over to Patience Brewster’s blog to get the entry information. Contest closes July 31st!
DIY photo grouping
If a tree falls in the forest but no one blogs about it, did it make a sound?
It’s not that I haven’t done anything creative lately, it’s just that I haven’t blogged about it. So depending on the answer to the first question, maybe it doesn’t count 🙂
Anyway, Cristybella and I were going through dozens of unused photo frames last weekend and I decided to put together a quick photo grouping for an empty spot on a wall. The idea credit goes to Photojojo, and you can see their original creation here.
I used a small piece of driftwood and some embellishments picked from my craft room desk drawers – you never know what you might find in there!

Seashells, beads and old keys ….

a memento from a happy vacation …

all clipped together with tiny clothes pins.

I honestly had to restrain myself from making one of these photo mobiles for every room of the house. Adorable, easy and oh so home sweet homemade!
Thanks for reading 🙂
cultivating a wreath
Last fall I was sitting in the hair salon turning the pages of a magazine and saw the prettiest wreath made of cotton bolls, sort of like this one (from the lovely and talented Layla at the Lettered Cottage). I thought, wow! That’s so creative!

Consequently, I added cotton to the list when I started purchasing seeds to cultivate some my annuals and replenish the kitchen garden. I remember growing a few cotton plants when I was a young girl and they were pretty, compact plants with large attractive flowers. Of course it’s not so easy to just buy a package of standard cotton seeds since it’s an agricultural crop product. I had to get an ornamental variety.

Even better. The dark red foliage will be the perfect complement for a few zinnias. I can never get enough zinnias. All of my seeds germinated quickly this year and will be ready to plant outdoors in just a few weeks.

Later this summer we’ll certainly be enjoying some cotton bouquets around the house and this fall I’ll have my own homesweethomemade version of Layla’s cotton boll wreath.
btw, it’s my birthday today and Cristybella is frosting a cake just now. It’s time to go taste a slice – yum!
blooming this week


.
blooming this week: zinnias, scarlet bouvardia, peachie’s pick stokesia
blooming this week
Chaste Lilac and friends–


blooming this week
Saturday mornings usually involve feeding the squirrels and birds, playing with the dogs and general garding chores.


.
blooming this week
Our landscape designer visited this week and brought along a variety of coneflower that I don’t believe I’ve ever seen – a prairie coneflower. So I’m looking forward to seeing those blooms. In the meantime, a few new plants joined the host of blossoms throughout the yard. Below the prolific bottlebrush, covered with honey bees and the buddleia blue chip.
 .
.
Assorted salvias surrounding the pool with amaryllis and portulaca below.
 .
.
With warm days and nights here, soil temps are increasing to the point where we should see much more growth and profuse blooms. Aided with a healthy supply of water and nutrients. Nothing about gardening is ever as carefree as it might appear.
Hope you enjoy your weekend!
